
A brief history of papier-mâché
The term “paper mache” is the same name given to different techniques for using glued paperwhether in the form of superimposed strips or a dough that has been kneaded beforehand.
The origins of papier-mâché must be found in China. From the second centuryafter their invention of paper, the Chinese used papier-mâché made from paper, plaster, water and glue to make helmets, among other things, on which they then applied lacquer to strengthen them.
Over time, they made magnificent lacquered objects, such as boxes, vases, etc. Then with the advent of trade and the arrival of paper in the West, the papier-mâché technique gradually developed. uncommon in Europe.
Uses and recipes have evolved over the centuries. In the 17th century, papier-mâché is particularly widespread and the city of Lecce, a city in southern Italy, makes it its specialty. It is then called “cartapesta”, which can be translated as “carton paste”.
In 1772, the British Henry Clay invented a new recipe for papier-mâché using paper, flour and glue, and filed a patent. This method is then used to create luxury items. From then on, the English aristocrats will allow papier-mâché to remain on the front of the stage.
It was in the 19th century that this technique became more popular, there are even papier-mâché factories, only to fall out of favor in the 20th century with the arrival of plastic.
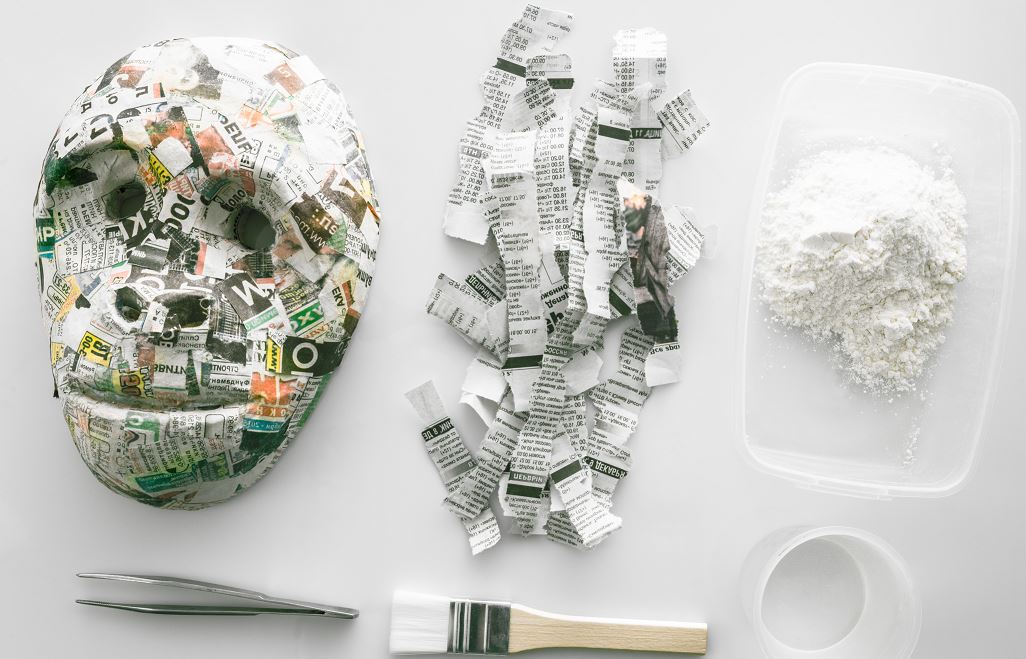
The necessary equipment
So why not make your own works of art out of papier-mâché?
To do this, you need your creative spirit and a few materials that you will undoubtedly find in your cupboards. Here is what you will need:
- a saucepan;
- a salad bowl type container;
- a whip ;
- paper, it can be old newspapers, books, small cardboard boxes, such as toilet paper rolls, cereal boxes;
- glue, wallpaper or homemade, the latter will allow you to benefit from a healthy, economical product suitable for use with children;
- a structure that will serve as a base, such as a balloon, a box or a creation of your choice made from wire mesh, wood, etc.
Make your homemade glue

If you have decided to make papier-mâché with young children, it is safer to use homemade glue.
Material
To make a glue that will be both healthy and economical, you will need:
- 5 measures of water;
- 1 measure of flour.
Steps to follow
- In a container, pour a measure of flour and add a measure of water, stirring to obtain a homogeneous mixture.
- In the saucepan, heat another 4 measures of water until it simmers. It should not boil.
- Then add the mixture of water and flour that you have prepared to the pan and continue to heat for a few minutes, stirring.
- As soon as the mixture begins to thicken, it’s ready.
- Wait for your glue to cool completely.
- You can then store it in an airtight jar for 3 to 5 days.
Use ready-made glue
If you want to simplify your life by not preparing your glue, you can opt for a more or less strong glue:
- It is possible touse white glue. In this case, you can mix 2 parts glue to 1 part water.
- If you want stronger gluemix equal parts glue and water.
- You can also use powder glue (paste for wallpaper) by mixing ⅔ of glue with ⅓ of water. This makes it possible to create papier-mâché objects that are more resistant over time.
Make a papier-mâché object

Once the glue is ready, you can move on to the most interesting stage, that of creation. To do this :
- Tear pieces of paper in the shape of your choice, it can be in the form of large strips, squares, etc.
- Dip them in the glue. No part must remain in the open air.
- When you take the papers out of their glue bath, remove the excess by passing each piece of paper between your fingers.
- Overlap the strips of glued paper on the structure you have planned. You can also create a bowl or a dish by turning a salad bowl over as a support.
- Wait until completely dry and if you wish, unmold the shape.
- Finally, it is possible to paint or varnish your object or leave it as is.
Make papier-mâché with cardboard
It is possible to use cardboard packaging to create papier-mâché.
Material
You’ll need :
- cardboard packaging;
- some water ;
- a container ;
- colander or sieve;
- a mixer ;
- flour glue.
Steps to follow
Once the materials are gathered, follow these steps:
- Tear cardboard packaging into small pieces.
- Immerse them in a container filled with water and let them soak overnight.
- With an immersion blender, mix everything together. If you have trouble mixing, add a little water.
- Pour the paste into a colander and squeeze to remove excess water. Your paper pulp is ready.
- Place the preparation in a bowl and pour one measure of glue for 3 measures of paper pulp.
- On a support of your choice, spread your mixture 1 cm thick.
- Wait until completely dry before removing the support.
Decoration ideas

We have seen that you can apply the papier-mâché to a support to give it the desired shape, but here are some other ideas for making it:
- To create table or other decorations on the occasion of a particular holiday, such as Christmas, Easter, a birthday, etc., you can use cookie cutters that you will fill with papier-mâché to a thickness of 1 cm. Avoid going beyond this thickness, as it will take a very long time to dry.
- It is also possible to knead the paper mache into the desired shape without necessarily using a support. In this case, a wire can help you mount your sculpture.
Everything is possible, let your imagination run wild!