Light is the most important design element for photographers and videographers. Softboxes help to properly illuminate your property. But what do creatives have to consider with the light sources and how do they set them up sensibly?
Every picture should tell a story – the photographer or videographer decides which one it is. One of the most important stylistic means in photography is light. True masters of lighting design use clever lighting to highlight the tone and character of a personality in portrait photos. There are of course different types of lighting. If the artist wants to create a lot of depth in the picture, shadows are essential. What photographers achieve in nature by positioning themselves at different angles to the sun or waiting for the star to move in different positions before capturing a scene or object is not that easy in the studio.
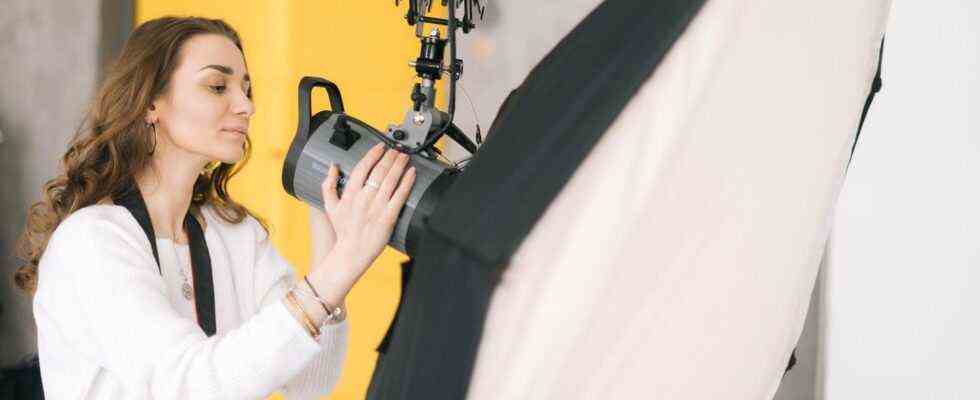
The softbox helps in the studio
A well thought-out concept with different unnatural light sources is required here. One of these light sources can be soft boxes. The name comes from its function: a large, mostly white diffuser fabric is stretched in front of an opaque frame in which there are one or more lamps. The fabric ensures that the light is refracted and thus “soft”.
Soft light is called “beauty light” because it literally lets people “look good”. This is because soft light tends to envelop an object and cast such soft shadows. In contrast, hard – i.e. unbroken light such as that of a light bulb – jumps off the object, producing more intense shadows.
Most softboxes are based on daylight in terms of their color temperature. This makes it easier for photographers in a light-protected studio, because they are neither dependent on daylight nor have to align their objects to natural light sources such as windows or doors.
Softboxes usually serve as fill light, but can also represent the main light source (more on this later). Of course, creative people are free to change the color temperature with other diffuser materials or warmer and colder light sources according to their ideas. But there are also LED softboxes that can shine in different color temperatures naturally.
1. Continuous light softboxes, set of 2
Beginners in exposure technology usually work best with a set of several light sources. The large boxes find support on lighting stands. If you don’t own them yet, you have to make sure that these tripods are included in the set. That is with Raleno kit the case. Above all, it impresses with its simplicity. The set contains two tripods, each of which has space for a foldable softbox. Once connected, the boxes can be tilted and tilted at an angle of up to 210 degrees. Photographers set the tripod a maximum of two meters high. Unfortunately, the 85 watt daylight bulbs cannot be dimmed.
2. Set with green screen
If you have enough space for a small photo studio, you can do so Set from the manufacturer Neewer squint. The nice thing about it is that the four lamp tripods in the set are compatible with other lighting sources from the manufacturer. Two more tripods hold three different colored backgrounds. The green background is particularly interesting for photographers and videographers: backgrounds can be used digitally after the colors green and blue. Why these colors are chosen is related to the fact that green and blue are extremely rare on the human body. They stand out against the skin tone, which makes it easier to crop people in post-processing. Unfortunately, the light sources in the set cannot be dimmed.
3. Dimmable LED softbox
No problem, the same manufacturer provides a remedy here and offers one Set of two with dimmable softboxes on. They are significantly more expensive, but rely on LED light sources instead of the classic energy-saving lamp. The LED panels light up in different color temperatures on request. The classic “softbox” rather simulates daylight. In addition to the arrangement of light sources, their color temperature is also an important stylistic element.
Warm light occurs in nature when the sun rises or sets. In this context, photographers and videographers also like to speak of the “magic hour”, i.e. the magic hour of a day. It is the time of a day when the sun has just disappeared behind the horizon, but the sky is still light and a little glowing. During this time, the sun emits a particularly warm and soft light, which is why the Magic Hour is often used to film or photograph particularly visually stunning scenes.
By the way: At lunchtime, the sunlight is particularly cold, hard (if it is not cloudy and is broken like this) and is at the highest point – so it hits the head from above. This creates unsightly shadows in the eyes. If you are out and about at this time of day, you should rather wait until 3 or 4 p.m. before taking pictures of your girlfriend or wife, or your husband or boyfriend, or on vacation. At least if you want to avoid your sweetheart looking like a zombie.
4. LED light panel with diffusers
As an alternative to the classic and quite large softbox, LED panels are suitable, over which you can pull smaller softboxes. Here again it is important that you remain loyal to one manufacturer, because not all LED panels work together with all softboxes. Neewer also offers LED panels. His Set of two “660” is dimmable and offers different color temperatures. Perfect if you want to experiment with warm or cold light. A white diffuser is included with the set. Photographers who want to work with colored light use colored diffusers. The manufacturer naturally offers various accessories for the 660 LED panels. Softboxes are also part of the party. Classic would be one round softboxbut who one Square with rounded corners preferred, get that too.
5. For semi-professionals: Walimex Pro
The presented softboxes and light sources are aimed at hobby users who like to take photos or want to illuminate themselves a little better during their YouTube reviews. Professional equipment is significantly more expensive in comparison, but also offers more features that go beyond entry-level light sources. The slightly higher priced ones are a set for ambitious amateur photographers Walimex studio flashes.
It includes three tripods, a softbox, two umbrella reflectors, a round reflector and a studio flash. Nice: The studio flash obeys a radio trigger, which photographers can use to control the modeling light or the flash output. For photographers, this set is the most extensive of the product comparison. However, videographers can (usually) save the studio flash.
Illuminating excursus: three-point technique
Once the light sources have arrived and set up, the question of how to arrange them remains. One basic rule must be observed: Shadows bring depth into the picture – it is therefore only logical that at least 50 percent of the consideration of the image design through lighting should fall on the shadows. If the camera and light source are on the same axis, all shadows fall behind the object to be photographed or filmed. This is exactly what should be avoided if there is no reasonable stylistic justification to back up the story of an image or video.
Three light sources for balanced lighting
Most creative people learn what is known as three-point lighting technology at the beginning of their training to ensure that the lighting in the studio is as balanced as possible. It uses three light sources: the “key light” (main light), the “fill light” and the “back light” (background light). The key light is always the brightest. The further it is from the axis of the camera, the more contrast – i.e. shadows – is created on the object and ultimately in the image.
Three steps for a classic exposure:
- Point the main light to the right of the camera at the object at a 45-degree angle
- Point the fill light at the object at a similar angle to the left of the camera
- If necessary, align the background light to the side or directly behind the object
Logical: the main light is the brightest
A good starting position is a 45-degree angle to the camera, because this position offers a balanced mix of light and shadow on the object. Depending on whether more or less contrast is desired, the artist can change the angle of the main light to the camera. The most extreme extreme case would then be so-called contre jour photography, in which the photo is taken against the light in order to make only the silhouette of the object visible in black.
Softbox fills in shadows: the fill light
The fill light is used to fill in the shadows created by the key light. Important: The fill light must never be as bright as the key light, because otherwise there would be no more shadows to be seen – the image would therefore lose its depth. Often, reflectors (such as umbrellas with an inner coating) are used for the Fill-Light, which throw the light jumping from the reflector onto the object. Softboxes are just as popular. Align the fill light at a similar angle to the main light, only on the left or right side of the camera, so that the shadow cast by the object that is created by the main light is weakened.
Stand out from the background: the backlight
The back light is positioned frontally or to the side behind the object. It is used to make the object stand out from its background in the image. Some photographers and videographers do without it because the backlight sometimes looks unnatural. It should be used especially when the object unintentionally “merges” with its background and the image therefore appears flat. Whether a backlight is worthwhile therefore always depends on the situation and on whether it helps to support the desired effect of the photo.
These “rules” are by no means set in stone – as with any other type of image composition, the exposure should underline the story of a person or an object. That is why there is no such thing as “right” or “wrong” when it comes to lighting. Rather, it is about – as is so often the case in life – to know the standard, to break it in the right situation, to create a unique work of art. The joy of experimenting with lighting design is by no means wrong – on the contrary, joy only arises when you try out different types of lighting and how they affect the viewer.
You might also be interested in
This article contains so-called affiliate links. Further information are available here.