
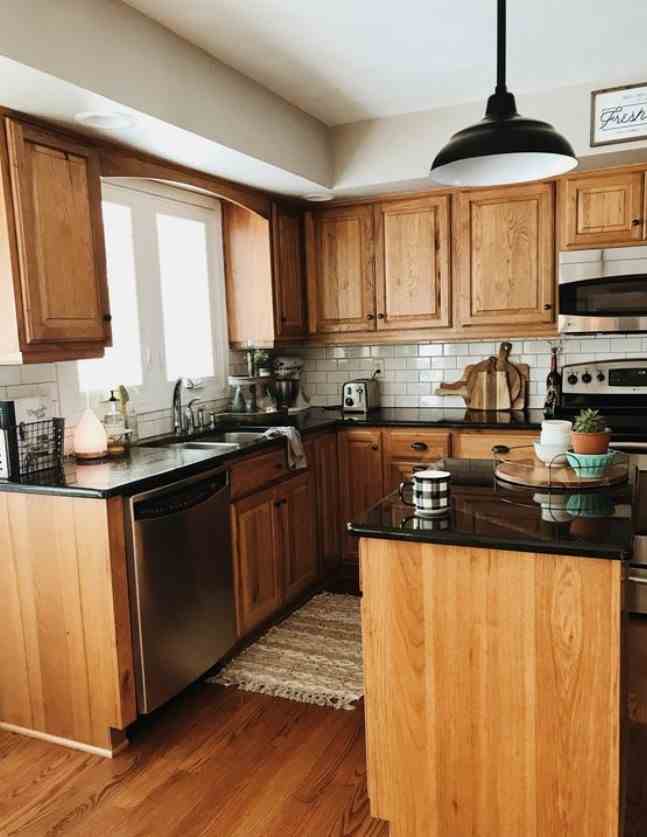
Why lighten an oak kitchen?
This noble wood that is oak was found in all kitchens at one time. Guarantee of quality, it brings a rustic touch to the room, but due to its dark color and its massive side, it tends to darken the room and make it look smaller than it actually is. At present, the vast majority of us are in demand for more light and space in our interiors. Your choice of a lighter kitchen can be motivated by different reasons:
- You may wish revamp your kitchen to give it a more modern touch. Indeed, light wood is part of the decor trend at the moment.
- It can also be for bring more light to this room in which you spend a lot of time.
- It can be for get rid of that massive side and imposing that the oak confers and which can be oppressive.
In any case, we offer solutions here that will help you achieve your goal, provided you follow the different steps to avoid damaging your kitchen.
The preparation
Before you can start, it is necessary to Prepare your site and surfaces. This step should not be overlooked, as it is as important as the rest of the work and will have an impact on the final result.
The furniture
First, it is necessary to prepare the furniture to be lightened. That means :
- remove the doors and protect the fittings that you cannot remove with aluminum foil, among other things;
- remove items such as metal handles so as not to risk damaging them during the process.
- remove the drawers;
- lightly sand the surfaces to be lightened so as to eliminate the wax or varnish which could cover them and which would block the products used.
The workspace
If you have the possibility to move the furniture, this will allow you to work in a more suitable space, such as a garage, outdoors if the weather permits, etc. Otherwise, it is necessary to protect from splashes the floor of the room, as well as anything that may be in it. To do this, you can use boxes, a tarp, old sheets, etc.
To avoid unnecessary comings and goings, also remember to bring together all the equipment necessary for the chosen technique at your fingertips.
Methods of thinning oak
You can choose from different tricks to brighten up your oak kitchen. Their common point is that they all ask to work in a ventilated space and to protect themselves with glasses, a mask and gloves. Moreover, whatever the method used, remember to treat all surfaces, including drawer fronts, at the same time.
1. Oxalic Acid
This first solution is the most effective for bleaching the oak. Sold in powder form, oxalic acid, also called “sorrel salt”, is a launderer super efficient.
- Pour 200 g of oxalic acid into 1 liter of hot water.
- Apply this mixture to the entire surface to be treated with a brush or sponge.
- Wait 2 hours to let the product act.
- You can then proceed to a first rinse with cold water.
- A second rinse is then necessary with a mixture of water and methylated spirits or rubbing alcohol in equal parts.
- Wait until the furniture is completely dry.
2. Hydrogen peroxide and ammonia
You can also lighten your oak furniture by using a mixture of hydrogen peroxide, also called “hydrogen peroxide”, and ammonia. Be careful, ammonia can attack woodso you must make sure to carry out a preliminary test on an inconspicuous area.
If the test result is satisfactory, then you can proceed as follows:
- In an appropriate container, mix 95 centiliters of hydrogen peroxide and 5 centiliters of ammonia. Depending on the size and number of pieces of furniture to be lightened, it may be necessary to prepare a larger quantity of this mixture, but it is then essential to respect these proportions (i.e. 1 part ammonia for 19 parts water) .
- Once the mixture is ready, it’s time to apply the product using a soft brush, paintbrush or sponge.
- When the entire piece of furniture is covered, wait about 1 hour to let the products act.
- Rinse with a clean sponge previously moistened.
- You can then pass a sponge impregnated with white vinegar over the entire piece of furniture.
- Dry the furniture with a clean cloth, then wait until it is completely dry.
- It is possible to renew the operation if the shade obtained is not sufficiently clear. Nevertheless, it will be necessary to wait 24 hours before being able to do so.
3. Methylated spirits
A gentler technique for brightening dark oak furniture is to use rubbing alcohol. But if you do not risk damaging your kitchen furniture, the results are less convincing. Rubbing alcohol will only allow you one light brightening. Here’s how:
- Pour the methylated spirit into a container that allows for more practical use of the product.
- Impregnate a sponge or cloth with this product.
- Then rub the entire surface to be treated.
- You may see a gradual discoloration of the wood. It may therefore be necessary to renew the treatment several times to obtain the desired shade.
- Rubbing alcohol has the advantage of drying very quickly. As for the smell, after a few hours it should fade.
4. Bleach
Her too a launderer, bleach will allow you to lighten an oak kitchen cabinet. Easy to find, it is a solution that can be implemented very simply. It is then possible to proceed as follows:
- In a basin or bucket, for example, dilute 10 centiliters of bleach in 1 liter of hot water. It is important that the water is hot, as this increases the effectiveness of the bleach.
- Apply the mixture using a brush. As soon as the product is applied, you will notice that the wood clears up.
- Rinse with clear water.
- Wait until completely dry.
- After 24 hours, if the shade is not light enough, it is possible to renew the treatment.
5. Lightening products
A final solution is to use specific products. Available in DIY stores, they can brighten up an oak kitchen. To use them, it is necessary to follow the manufacturer’s instructions, as well as the conditions of use. To choose it well, you can ask a salesperson for advice. Do not hesitate to leave with a photo of the furniture in question. This type of product generally requires furniture sanding and stripping. Here are the general steps to follow:
- First, strip the furniture with sandpaper.
- Then apply the bleach using a brush.
- Wait the number of hours prescribed by the manufacturer for the product to dry.
- Apply a second coat and let dry.
- Mix 1 volume of vinegar for 4 volumes of water and rub the entire surface with a cloth previously impregnated with this product.
Finalize your work
After lightening your oak kitchen, it will then be necessary to proceed with the finishing. For this step, it is imperative that all the elements are perfectly dry. If in doubt, wait longer. It is necessary to count about 15 days for thorough drying of the wood. For the finish, it all depends on the end result you are aiming for:
- If you want to keep the color you have obtained, you can apply a clear varnish which will protect the wood from grease and water, which are inevitable in a kitchen.
- Another solution is to apply a tinted varnish to obtain a bleached oak effect.
- You can also apply white, gray paint or the color of your choice diluted with white spirit.