major cleaning
Spring cleaning: This is how your apartment becomes hygienically clean again
A spring cleaning makes sense and makes the apartment shine again
© AndreyPopov / Getty Images

The calendar spring is dated March 20, 2023 this year. One more reason for everyone who is currently spending a lot of time in their own four walls to get their apartment in shape again – and to clean it thoroughly.
One of the most popular excuses we use to avoid cleaning is “I don’t have time”. Due to the ongoing Corona crisis, however, more and more people are currently withdrawing into domestic isolation and working from home if possible. However, there are also numerous employees who cannot work in the home office and have to fill their days elsewhere. So why not use the time and do some spring cleaning? The traditional large-scale cleaning is not only a sensible occupation, but an extremely effective method to get the apartment hygienically clean. Certainly not a bad task in times of Covid-19. To make cleaning easier for you, you will find a helpful checklist for the most important steps below.
Why a cleaning schedule makes sense for spring cleaning
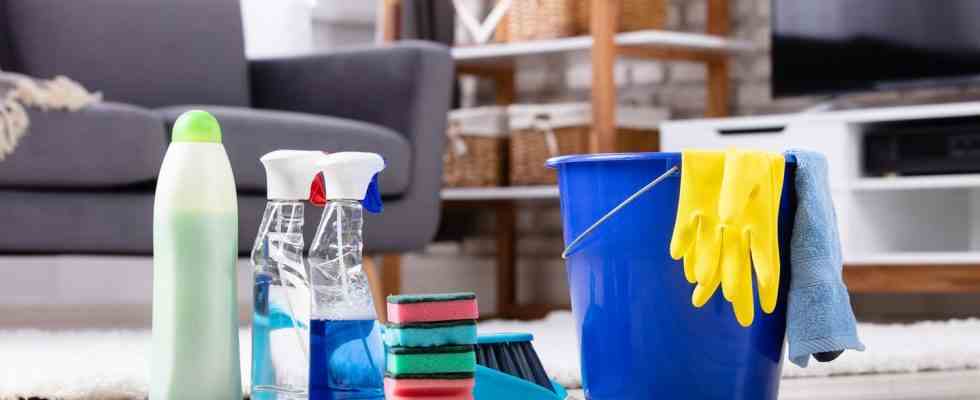
You should plan several hours for a thorough spring cleaning – a few days would be even better, so that you can work through your cleaning plan systematically and step by step. If you choose a different room every day, you can divide up the work better and not lose interest in cleaning so quickly. Alternatively, you can divide the rooms among your family so everyone has something to do and participate in the spring cleaning. Either way, it makes sense to create a plan of who should do what and when. Then you don’t lose track and save yourself double work steps. Before you get down to business, it makes sense to check your cleaning supplies. These are the most important tools:
Spring cleaning checklist: how to do it
1. Clean up the apartment
Before you can even start with the major cleaning, it is advisable to clear all surfaces that are to be cleaned – from the floor and shelves to tables and window sills. Take the opportunity and ask yourself for every item lying around whether you want to keep it. This gives you the opportunity to clear out, store, throw away or even donate everything that you no longer need as part of the spring cleaning: magazines, clothing, toys, paperwork, decorations, etc.
2. Clean windows
When the nights get shorter and the days longer, the first rays of sunshine reveal every dirty secret – especially on the windows and the curtains. While the fabric curtains can be cleaned in the washing machine, the glass panels require a little more effort. Here you can either remove the dirt by hand with water, washing-up liquid and a cloth or you can use a window vacuum – for example the brand Karcher. The device effortlessly cleans the windows for you, free of streaks and drips.
3. Wipe dust
After you have cleared all surfaces, you should free them from coarse dust – otherwise all the dust will be immediately redistributed to all surfaces after cleaning. Use a damp duster for dusting, then the dirt will stick to it better. Alternatively, you can also use one feather duster use, for example, to dust the plants. Make sure you always remove the dust from top to bottom, otherwise the dust will trickle down onto the surfaces that have already been cleaned.
4. Vacuum the floor
Once you have followed the first three steps, it’s the floor’s turn: Carefully vacuum off all coverings, including all cracks, corners and ledges. All smooth floors (including laminate and tiles) are then additionally damp-mopped – sensitive floors made of real wood can be cleaned with a special wood care product for parquet floors. You can then remove conspicuous stains on the carpets with a upholstery cleaner edit. Or you can use one steam cleanereg from Vileda.
5. Clean furniture
Dusting the shelves isn’t the end of the story, as there is still a wide variety of furniture that you can clean inside and out – such as tables and chairs, dressers and closets. Before you start cleaning, you should first clear out the pieces of furniture and, in the process, sort out everything that you no longer need. Then wipe the inventory with a damp cloth and let it dry well. You can also wash upholstery covers.
6. Clean the bathroom
Sooner or later it’s time for the bathroom – a place where germs and bacteria thrive. Particular attention should be paid to the fittings and the toilet, but the shower and/or the bathtub also need to be cleaned thoroughly. And the tiles. It is best to use an abrasive cleaner for stubborn spots, an all-purpose tile cleaner (in combination with a mop), a limescale remover for lime edges and a Mold remover against fungal spores. Throw away the used rags afterwards.
7. Clean the kitchen
Last but not least, it’s the kitchen’s turn: First, clean all the cupboards, preferably inside and out. To do this, you have to clear out all the groceries once again – and in the process sort out everything that has expired, for example. Then clean all work surfaces and tiles, depending on how dirty they are, with a standard all-purpose cleaner or a more aggressive cleaning agent, such as a degreaser. After that, it is finally the turn of the last trouble spots, such as the refrigerator, the stove, the oven, the microwave and the extractor hood.
If you have followed all seven steps in a row, you can be very proud of yourself. The apartment should now be completely clean, mucked out and hygienically clean. In addition, after the spring cleaning, you have peace and quiet until the next major cleaning – so in 2021 at the latest. Until then you can put your feet up, but of course the regular basic cleaning must continue.
You might also be interested in:
This article contains so-called affiliate links. Further information are available here.